Kali Linux is a well-known Linux distribution in the cybersecurity field. Based on Debian, it is specially designed for penetration testing, security audits and, more generally, for pentest professionals. It natively embeds tools such as Nmap, Metasploit, Burp Suite and Wireshark.
If you're just starting out, or simply want to test Kali Linux in an isolated environment, installing it on a virtual machine is an excellent option. This allows you to manipulate the distribution without touching your main system, in complete security.
In this article, I'll show you how to install Kali Linux on VirtualBox in just a few minutes, without going through the classic installation process. We'll be using an official preconfigured image provided by the Kali team.
You can find the content of this article in video form on my YouTube channel :
Why install Kali Linux in a virtual machine?
Although it's perfectly possible to use Kali Linux as a main system, I don't recommend it. For reasons of security and flexibility, I prefer to use it punctually in a virtual machine or on a dedicated machine.
This allows :
- compartmentalize your test environment,
- avoid directly exposing your offensive tools on your main workstation,
- test in complete freedom, without fear of breaking your system.
Step 1: Install VirtualBox
Start by installing VirtualBox, a free software package that lets you create and manage virtual machines on Windows, macOS and Linux. You can download it from the official Oracle website: https://www.virtualbox.org
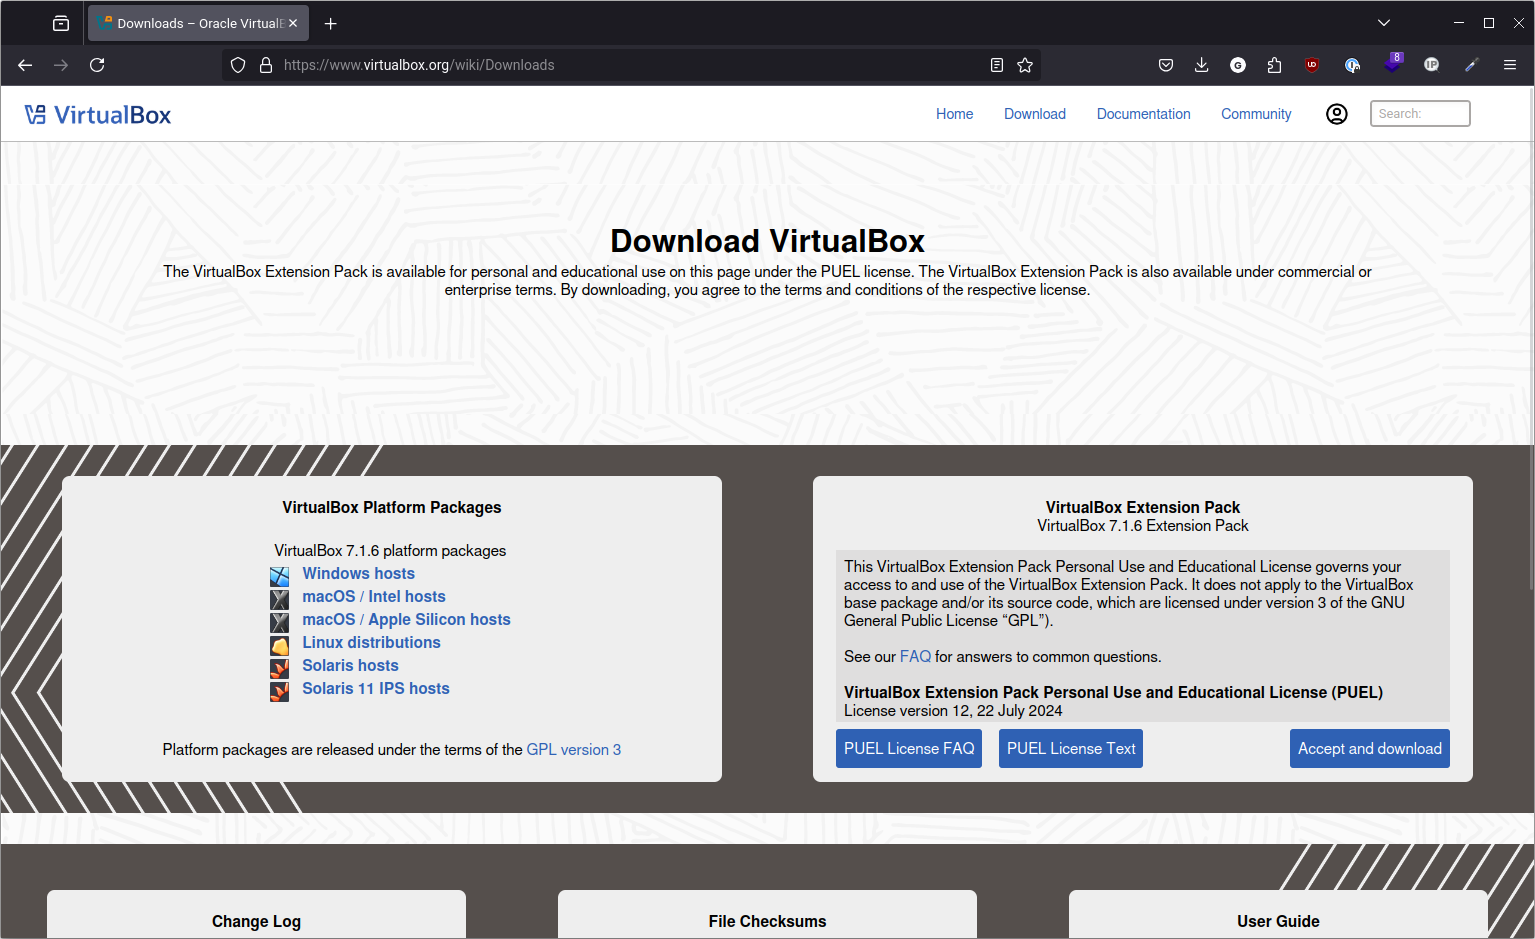
Choose the version corresponding to your operating system, then install it like any other software.
Step 2: Download the preconfigured Kali Linux image
The Kali team provides ready-made images for various hypervisors, including VirtualBox. This saves you the trouble of installing it manually.
Go to the official page: https://www.kali.org/get-kali/#kali-virtual-machines
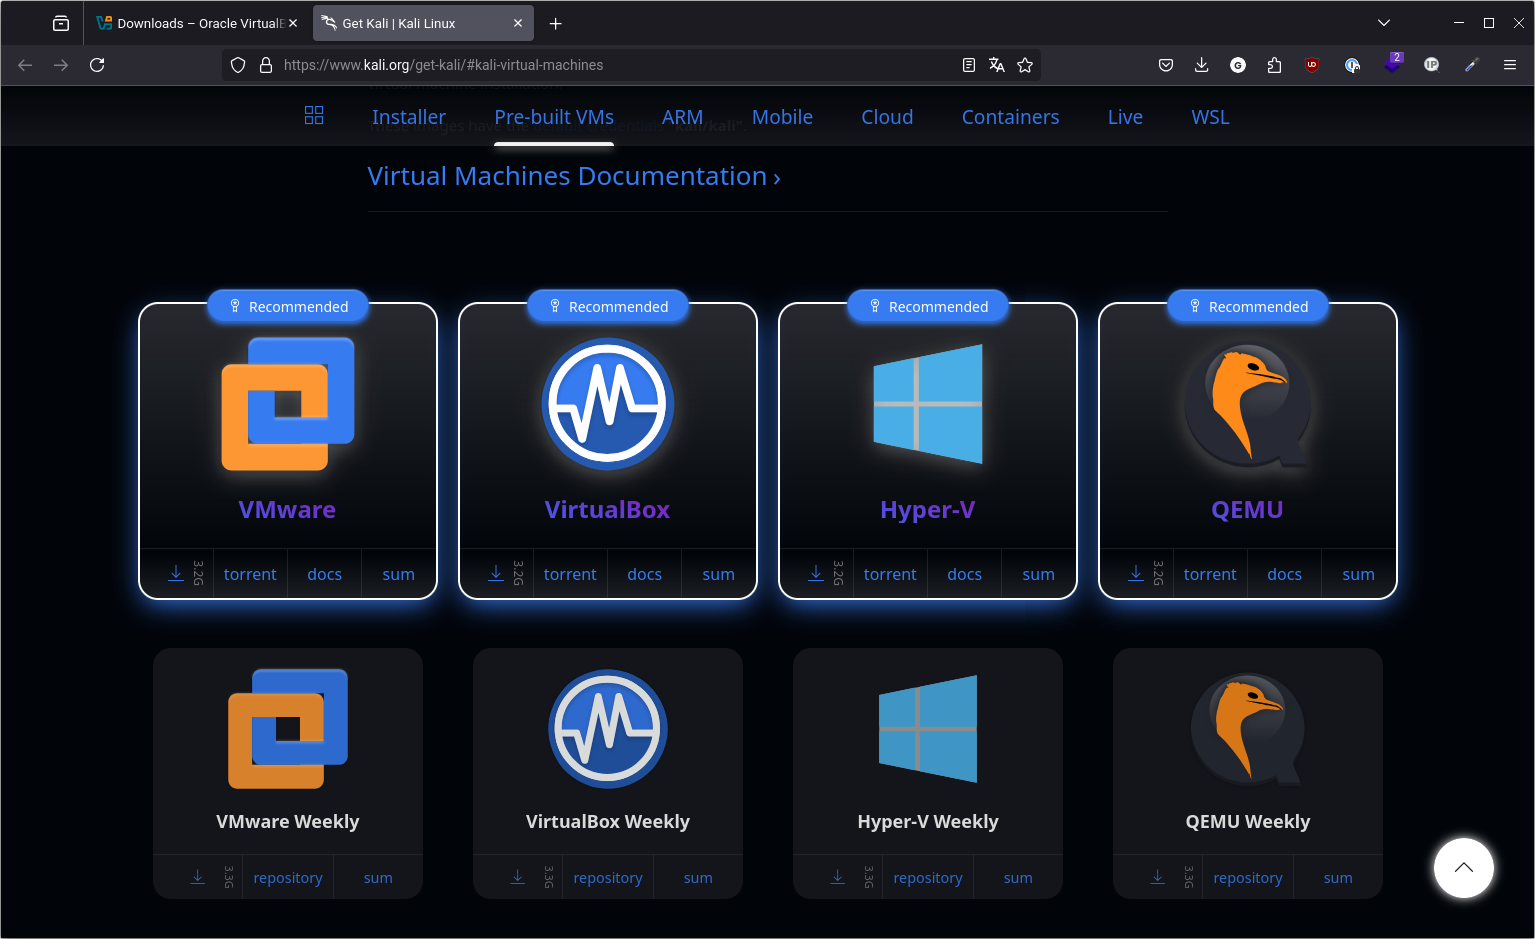
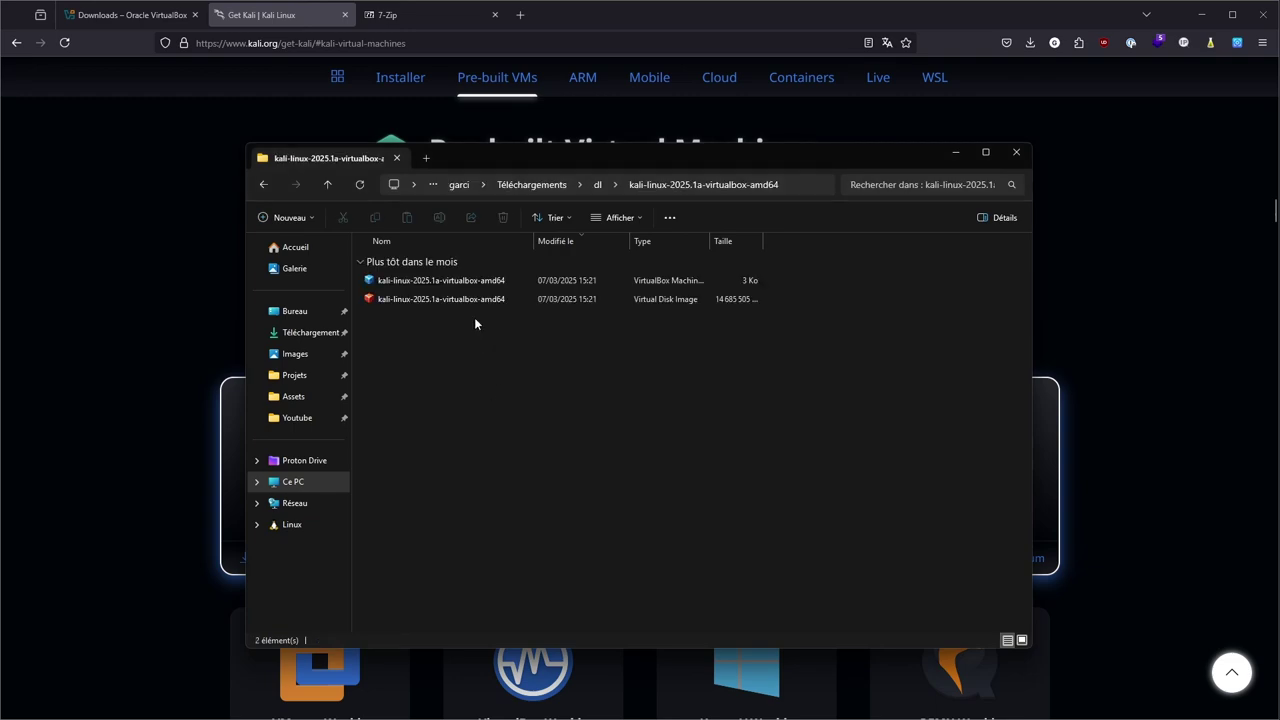
Download the VirtualBox image. It's usually available in .7z format and weighs around 3 GB. This archive contains everything you need to get your machine up and running right away.
Step 3: Extract the archive
Once you've downloaded the file, you need to decompress it. The archive is in 7zip format, so you'll need suitable software. Under Windows, you can use 7-Zip, and under Linux, your package manager should allow you to install the tool easily.
Unzip the archive into a folder that you won't be moving later. The extracted files, in particular the virtual disk, will be linked to the machine in VirtualBox.
Step 4: Import the machine into VirtualBox
Once the archive has been extracted, open VirtualBox. Click on "Machine" > "Add", then select the .vbox file contained in the folder. This file contains the virtual machine configuration.
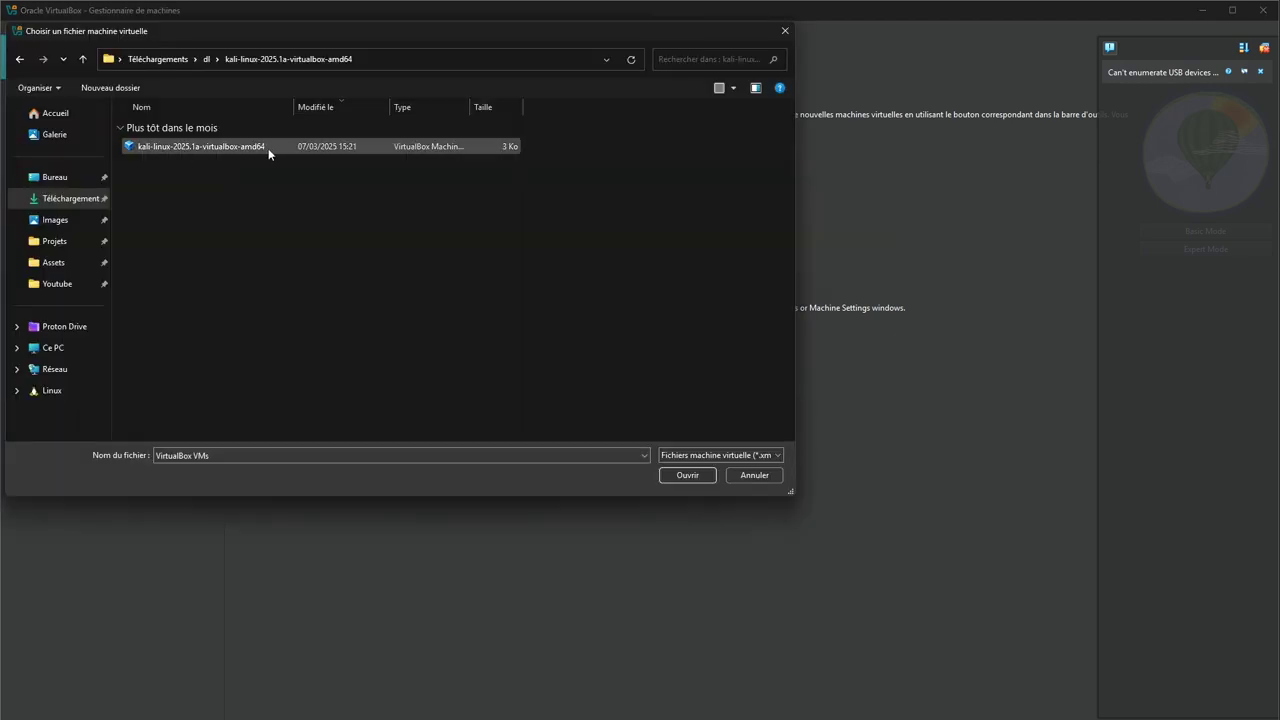
VirtualBox will automatically create a new machine, ready for use. This is a very quick operation: in just a few clicks, Kali Linux is installed.
Step 5: Configure network in "bridge access" mode
Before launching the machine, we recommend a final setting: network configuration.
By default, VirtualBox connects machines via NAT. To simulate more realistic behavior on a local network, you can switch the network interface to "bridge access" mode. This allows your Kali machine to behave like a physical host, visible on the network.
Go to the VM settings, then to the "Network" tab. Select "Bridge access" mode and choose your physical network interface (Wi-Fi or Ethernet, as appropriate).

This configuration is particularly useful for tests such as scanning the local network or opening incoming connections (e.g. reverse shell).
Step 6: Launch Kali Linux
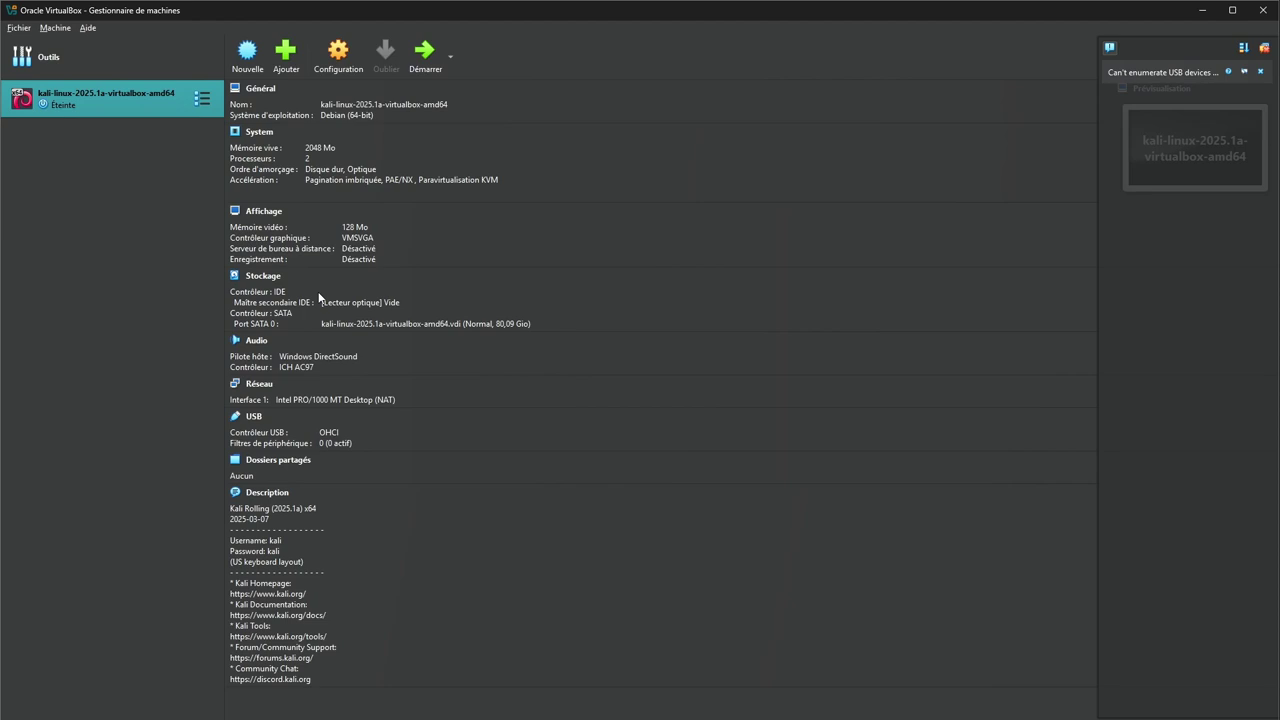
Your machine is now ready. Click on "Start" in VirtualBox to launch the VM.
The default credentials are :
- Username: kali
- Password: kali
Please note: By default, Kali Linux is configured with a QWERTY keyboard. The letter "a" will therefore be displayed as "q", and the letter "q" as "a" if your host machine is configured in AZERTY. We'll see how to correct this in a moment.
Now you're connected to a fully operational Kali Linux instance, in just a few minutes.
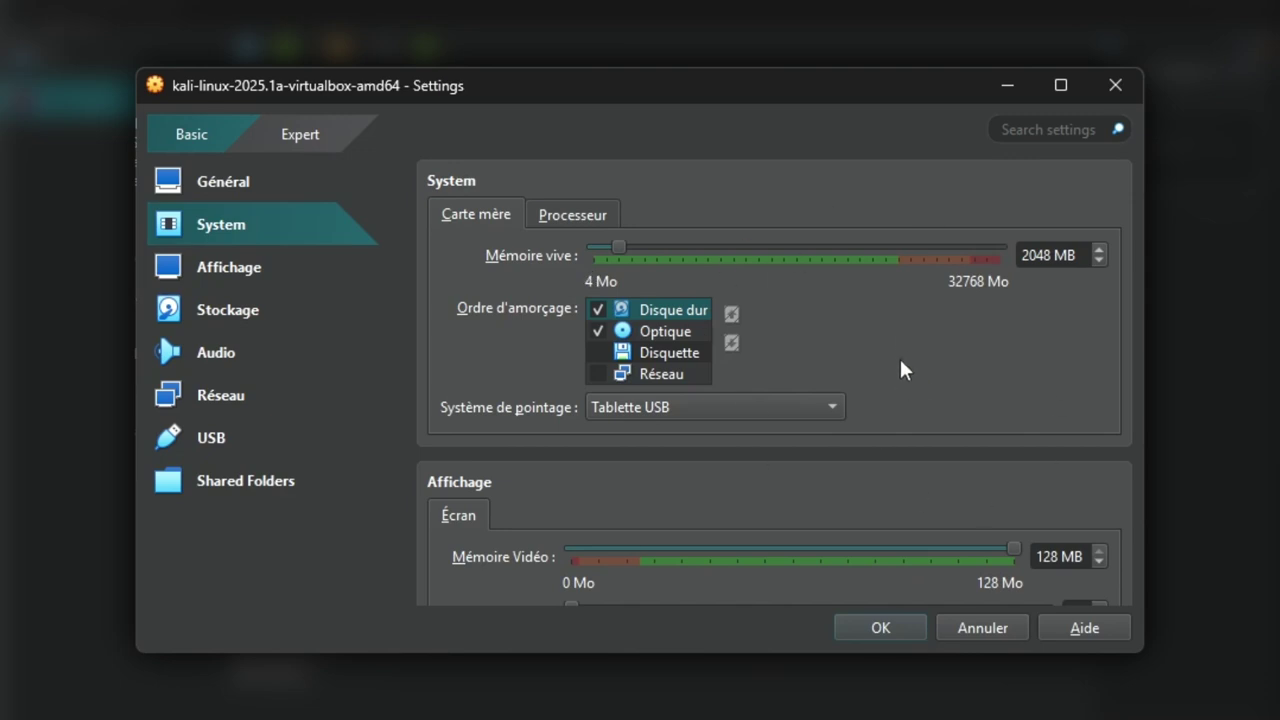
Step 6: Adjust VM performance
If your host machine allows it, you can allocate more resources to Kali Linux. In the VM's system settings, for example, you can increase RAM or the number of CPU cores allocated. This will make the environment run more smoothly, especially when using demanding tools.
Step 7: Configure the AZERTY keyboard
As mentioned above, the default keyboard layout is QWERTY. To correct this, you can change the keyboard configuration in Kali Linux.
First of all, in the Kali machine, click on start, then on "Settings" and "Keyboard".
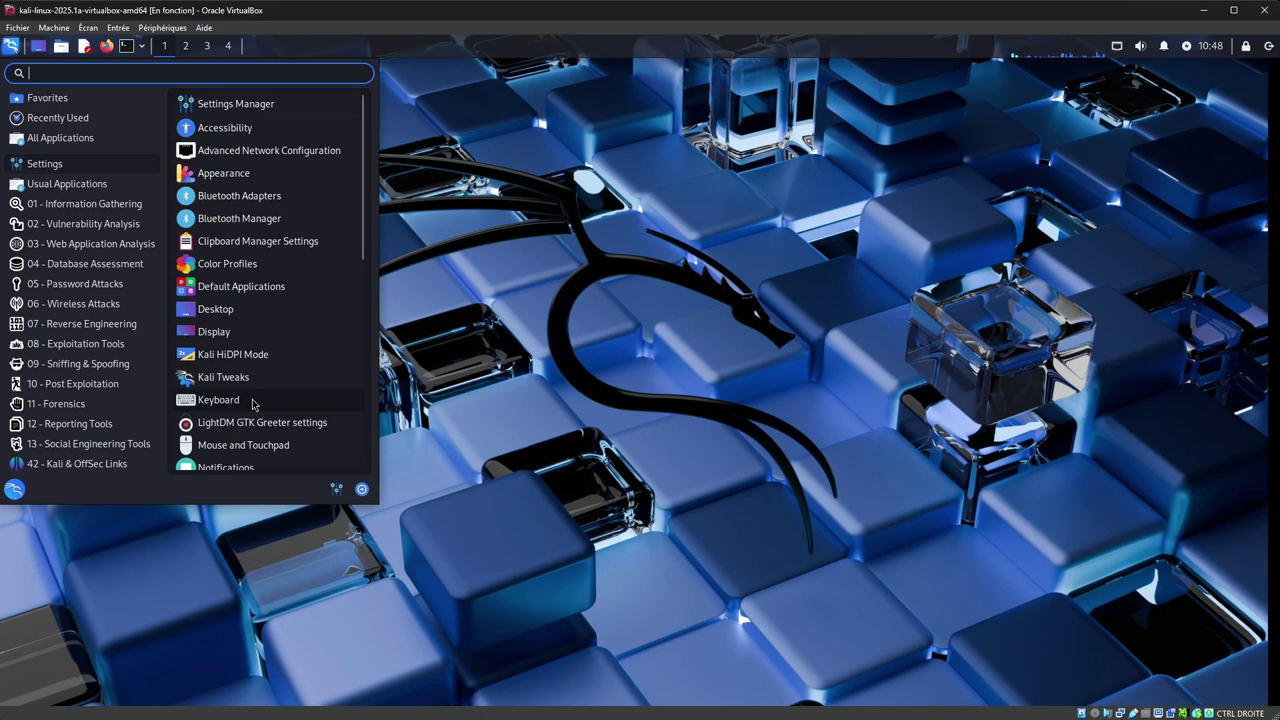
Next, go to the "Layouts" tab, select the current layout "English (US)" and click on "Edit", then select "French" from the list.
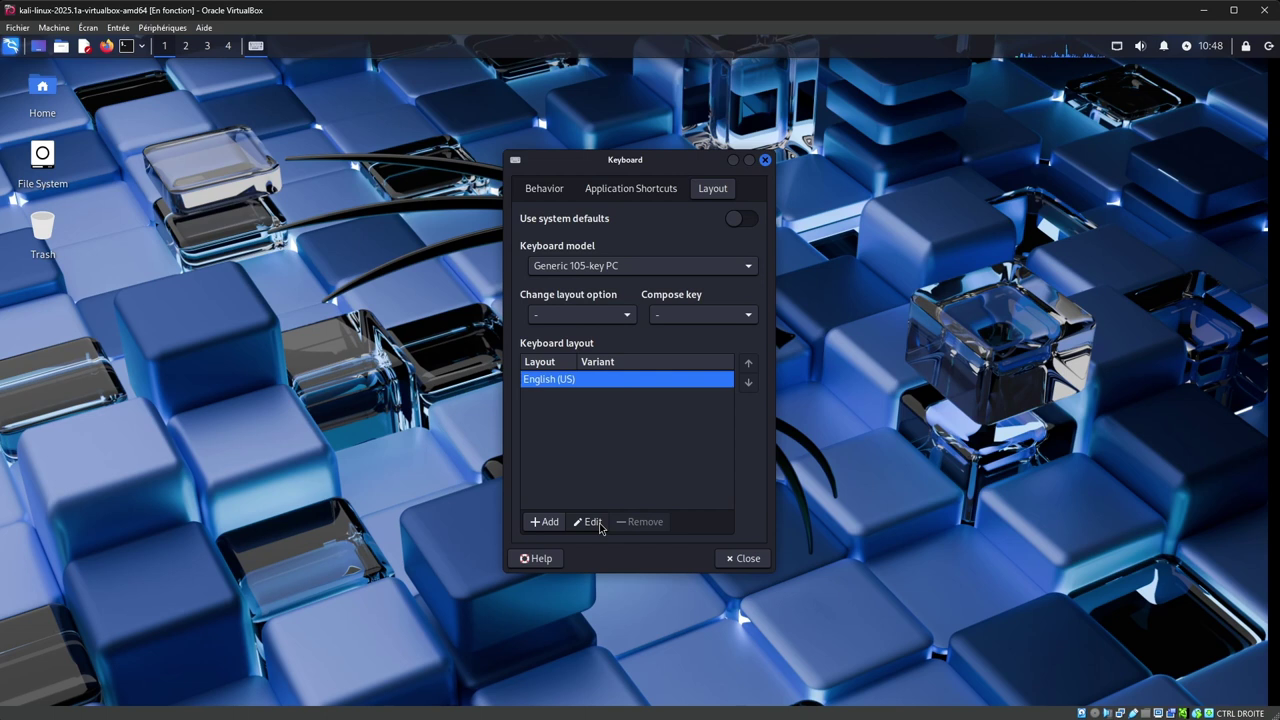
Click "Ok" to confirm, then close the settings window.
The keyboard is now configured in AZERTY on Kali Linux, but there are still some places where this layout is not applied, for example on the login interface.
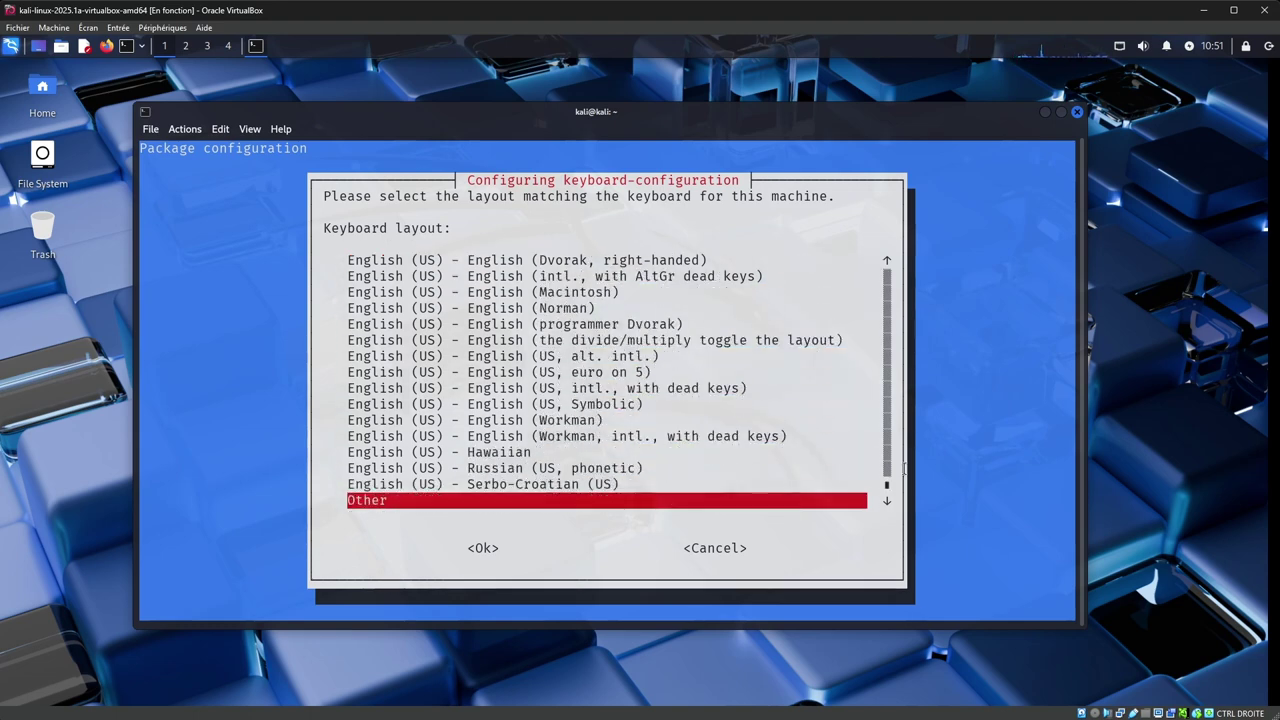
To finalize the configuration, open a terminal and type the following command:
sudo dpkg-reconfigure keyboard-configuration
On the first screen, you can leave "Generic 105-key PC" and press "Enter".
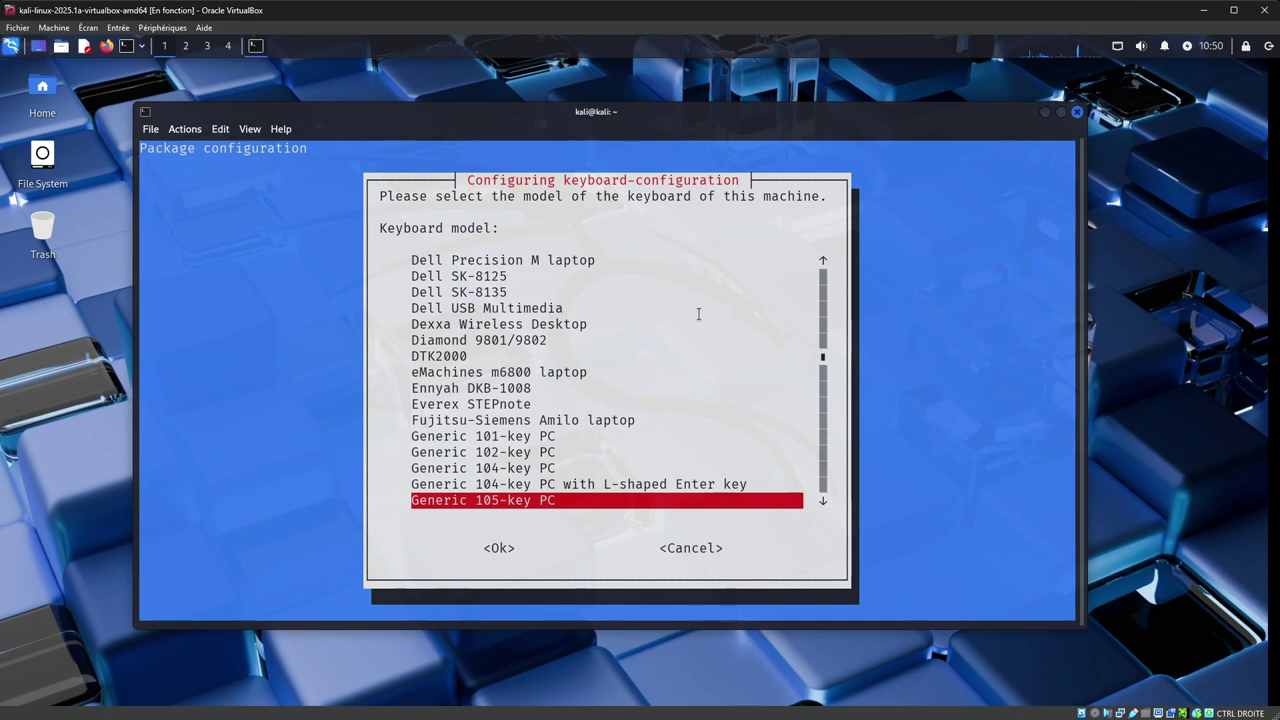
On the second screen, select "Other" at the bottom, and press "Enter".
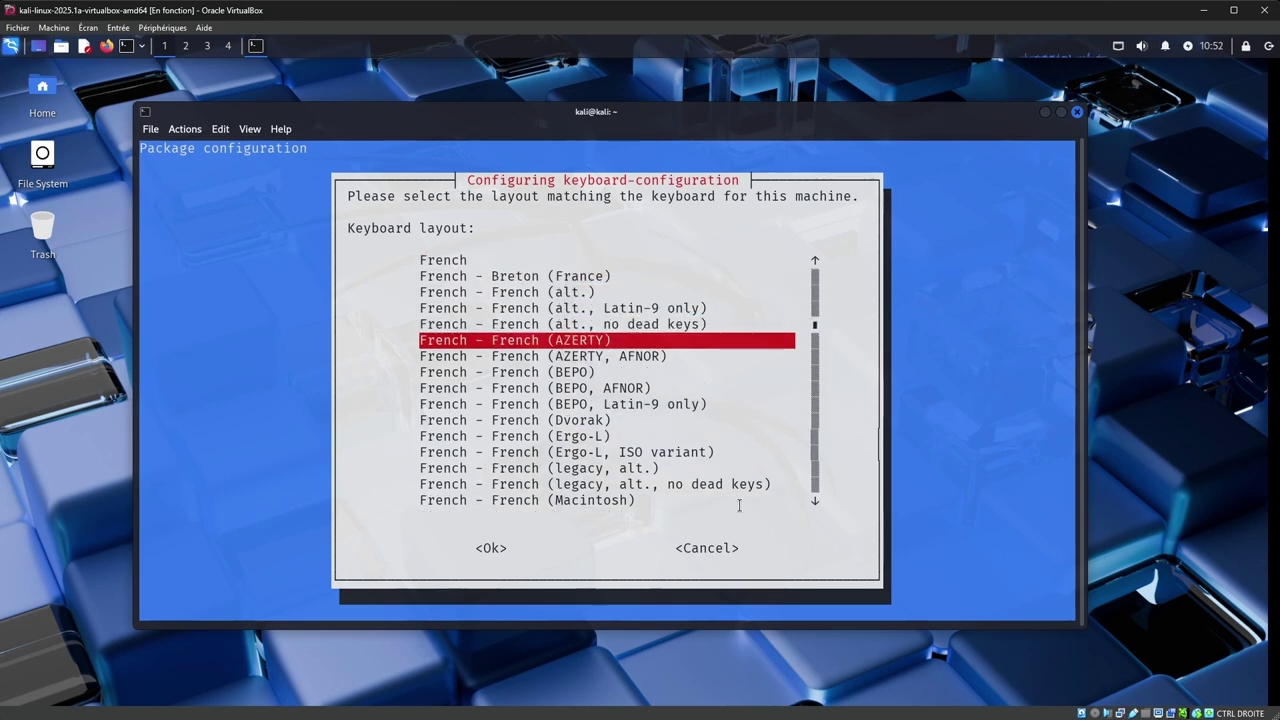
On the third screen, select "French" and press "Enter", then select "French (AZERTY)" and press "Enter".
You can then leave everything as default, by pressing "Enter" until the configuration is complete.
You can now restart the machine to apply the changes, and your keyboard will be configured in AZERTY on the whole machine.
Conclusion
Installing Kali Linux on VirtualBox is easy for anyone, and takes just a few minutes thanks to the preconfigured images. It's an excellent way to learn about cybersecurity, test tools or prepare an experimental environment.
If you're new to the field, it's a great entry point. And if you've already got the hang of it, this method will save you precious time.
Need help with your cybersecurity projects? Contact Secureaks